Use this page to set up EvidenSend, test it once properly, and understand the fastest daily-use flow.
Run one full test flow before relying on the app: start Send Now, verify what reaches your destination, and confirm your local or cloud copies behave the way you expect.
1. Before you start
Allow camera, microphone, and notifications. Enable location only if you want map links in messages.
Prepare at least one destination path before real use: local copy, iCloud, Email, or Dropbox.
Set up each delivery method you want to use before relying on it. The SMS button is only available when Email or Dropbox delivery is enabled. Dropbox links in SMS only work if Dropbox delivery is enabled.
Confirm internet access and storage availability.
2. 5-minute quick setup
Open settings and first choose which destinations you want to use: On This iPhone, iCloud, Email, or Dropbox.
If you want a low-friction private test, use Send to me only.
Run one short Send Now test and confirm exactly what arrived.
3. Login and app password help
Dropbox setup uses normal Dropbox sign-in.
Email setup may require an app password right away, especially with iCloud Mail and Gmail.
For supported providers, the app includes direct Create links in the Email setup screen for app password setup. Use those links if Email setup asks for an app password.
If your mail provider requires an app password, create it in the account security settings before trying Email setup.
If app password is not available, check that 2-step verification is enabled for that account.
If setup feels complex, you can create a separate Gmail account just for EvidenSend receiving and testing.
Save recovery methods for that account and run a full test flow after setup.
4. Daily use: use widget first
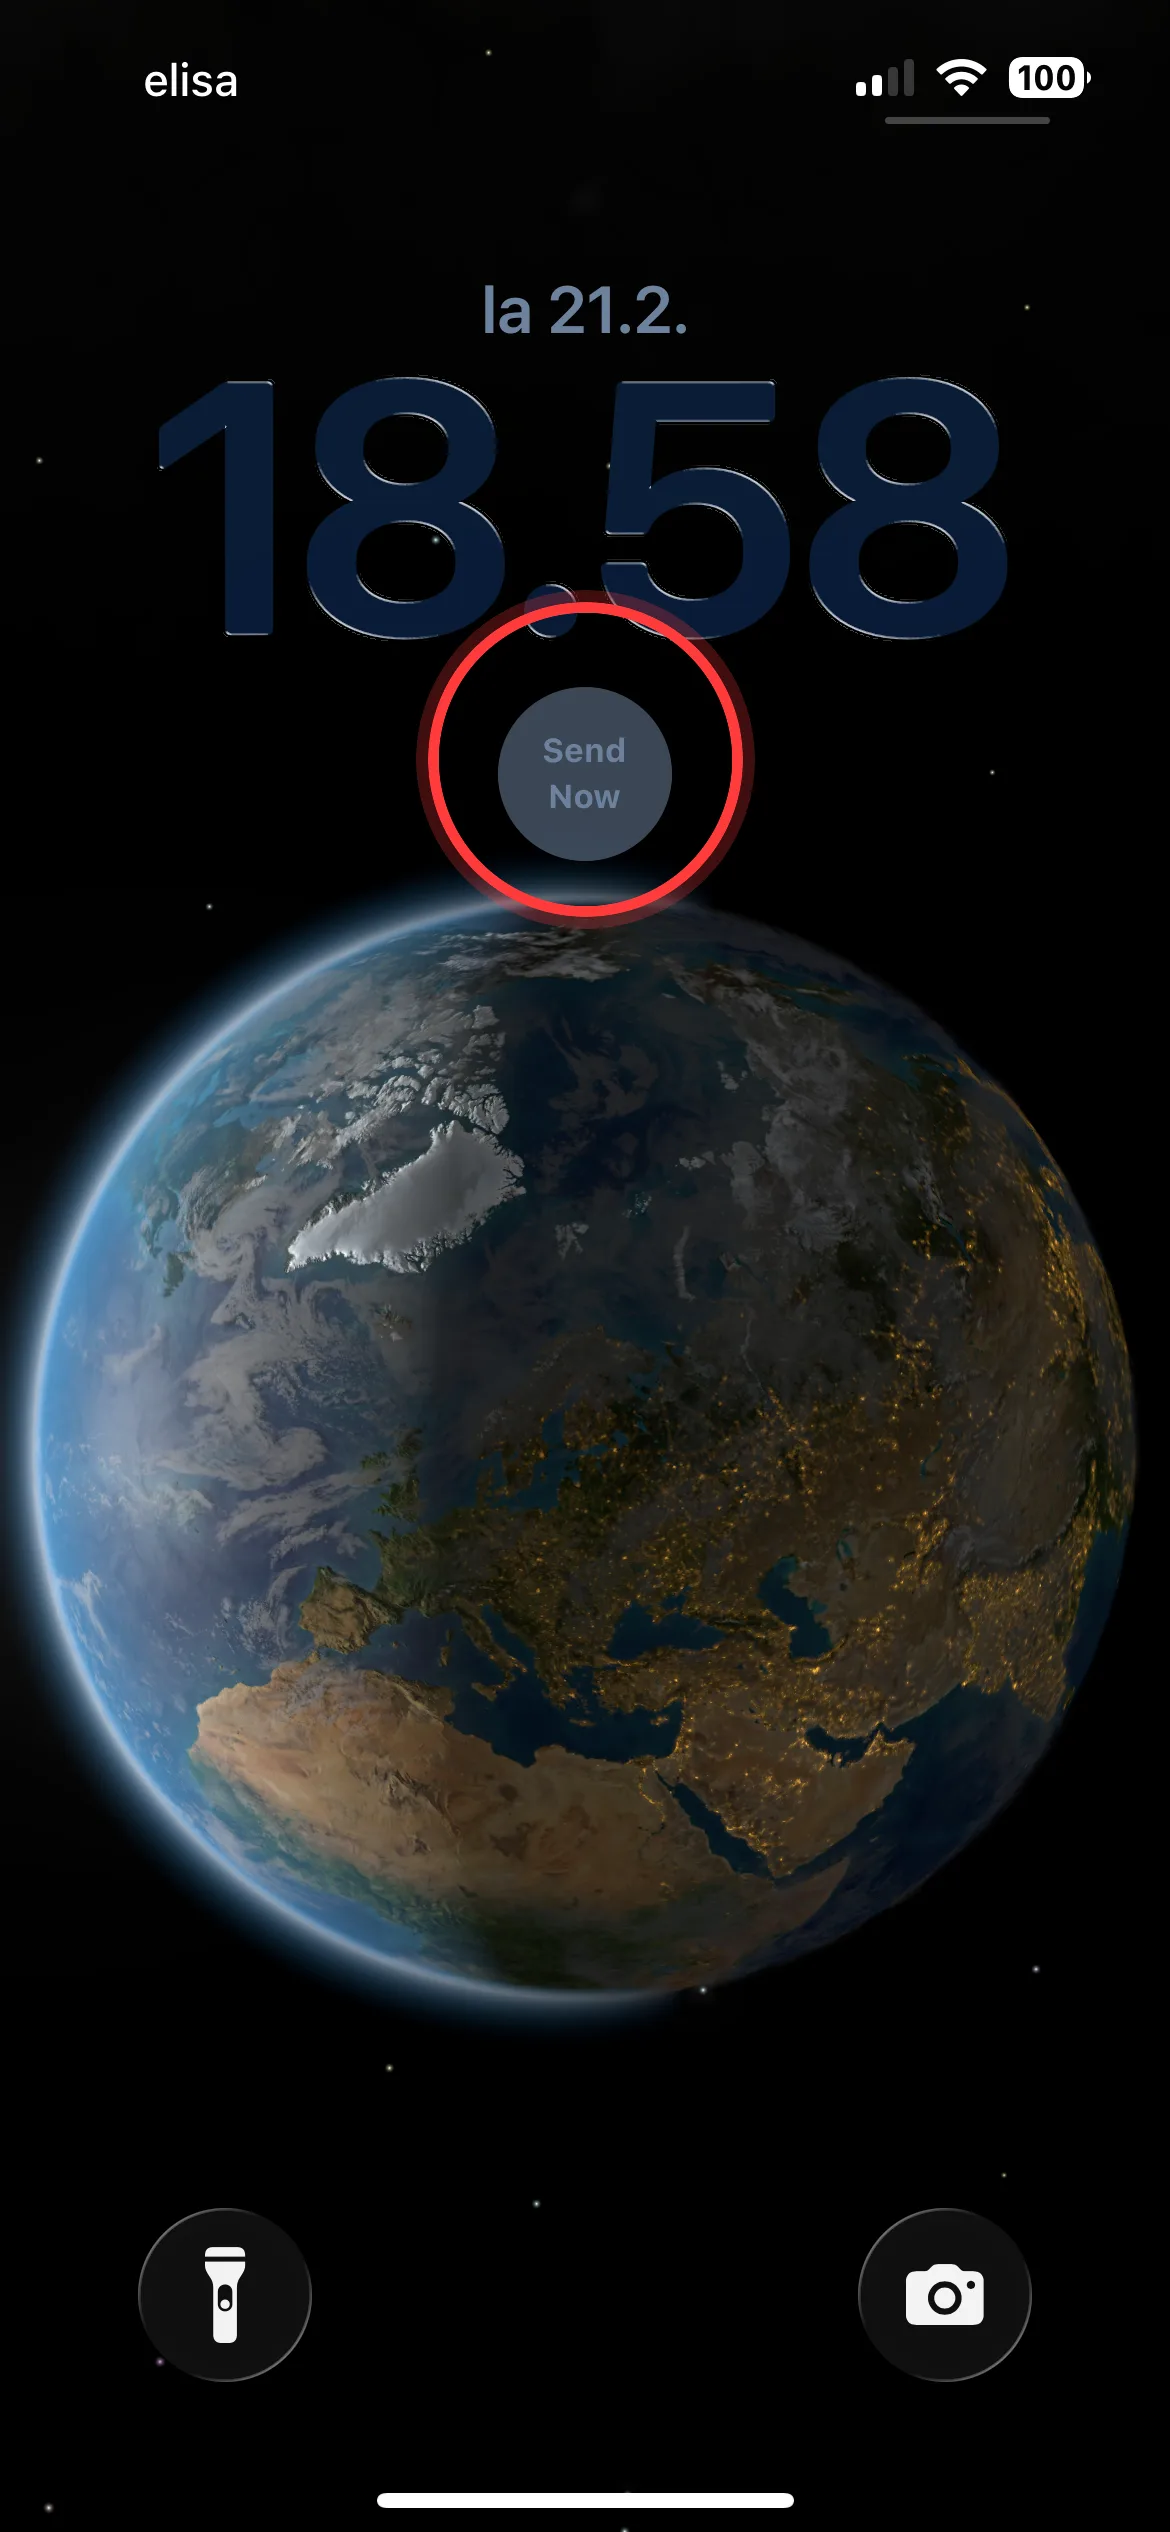
For the fastest start, use the Send Now widget from Lock Screen or Home Screen. Use the in-app Start and Send button as a fallback.
Primary: Lock Screen Send Now widget.
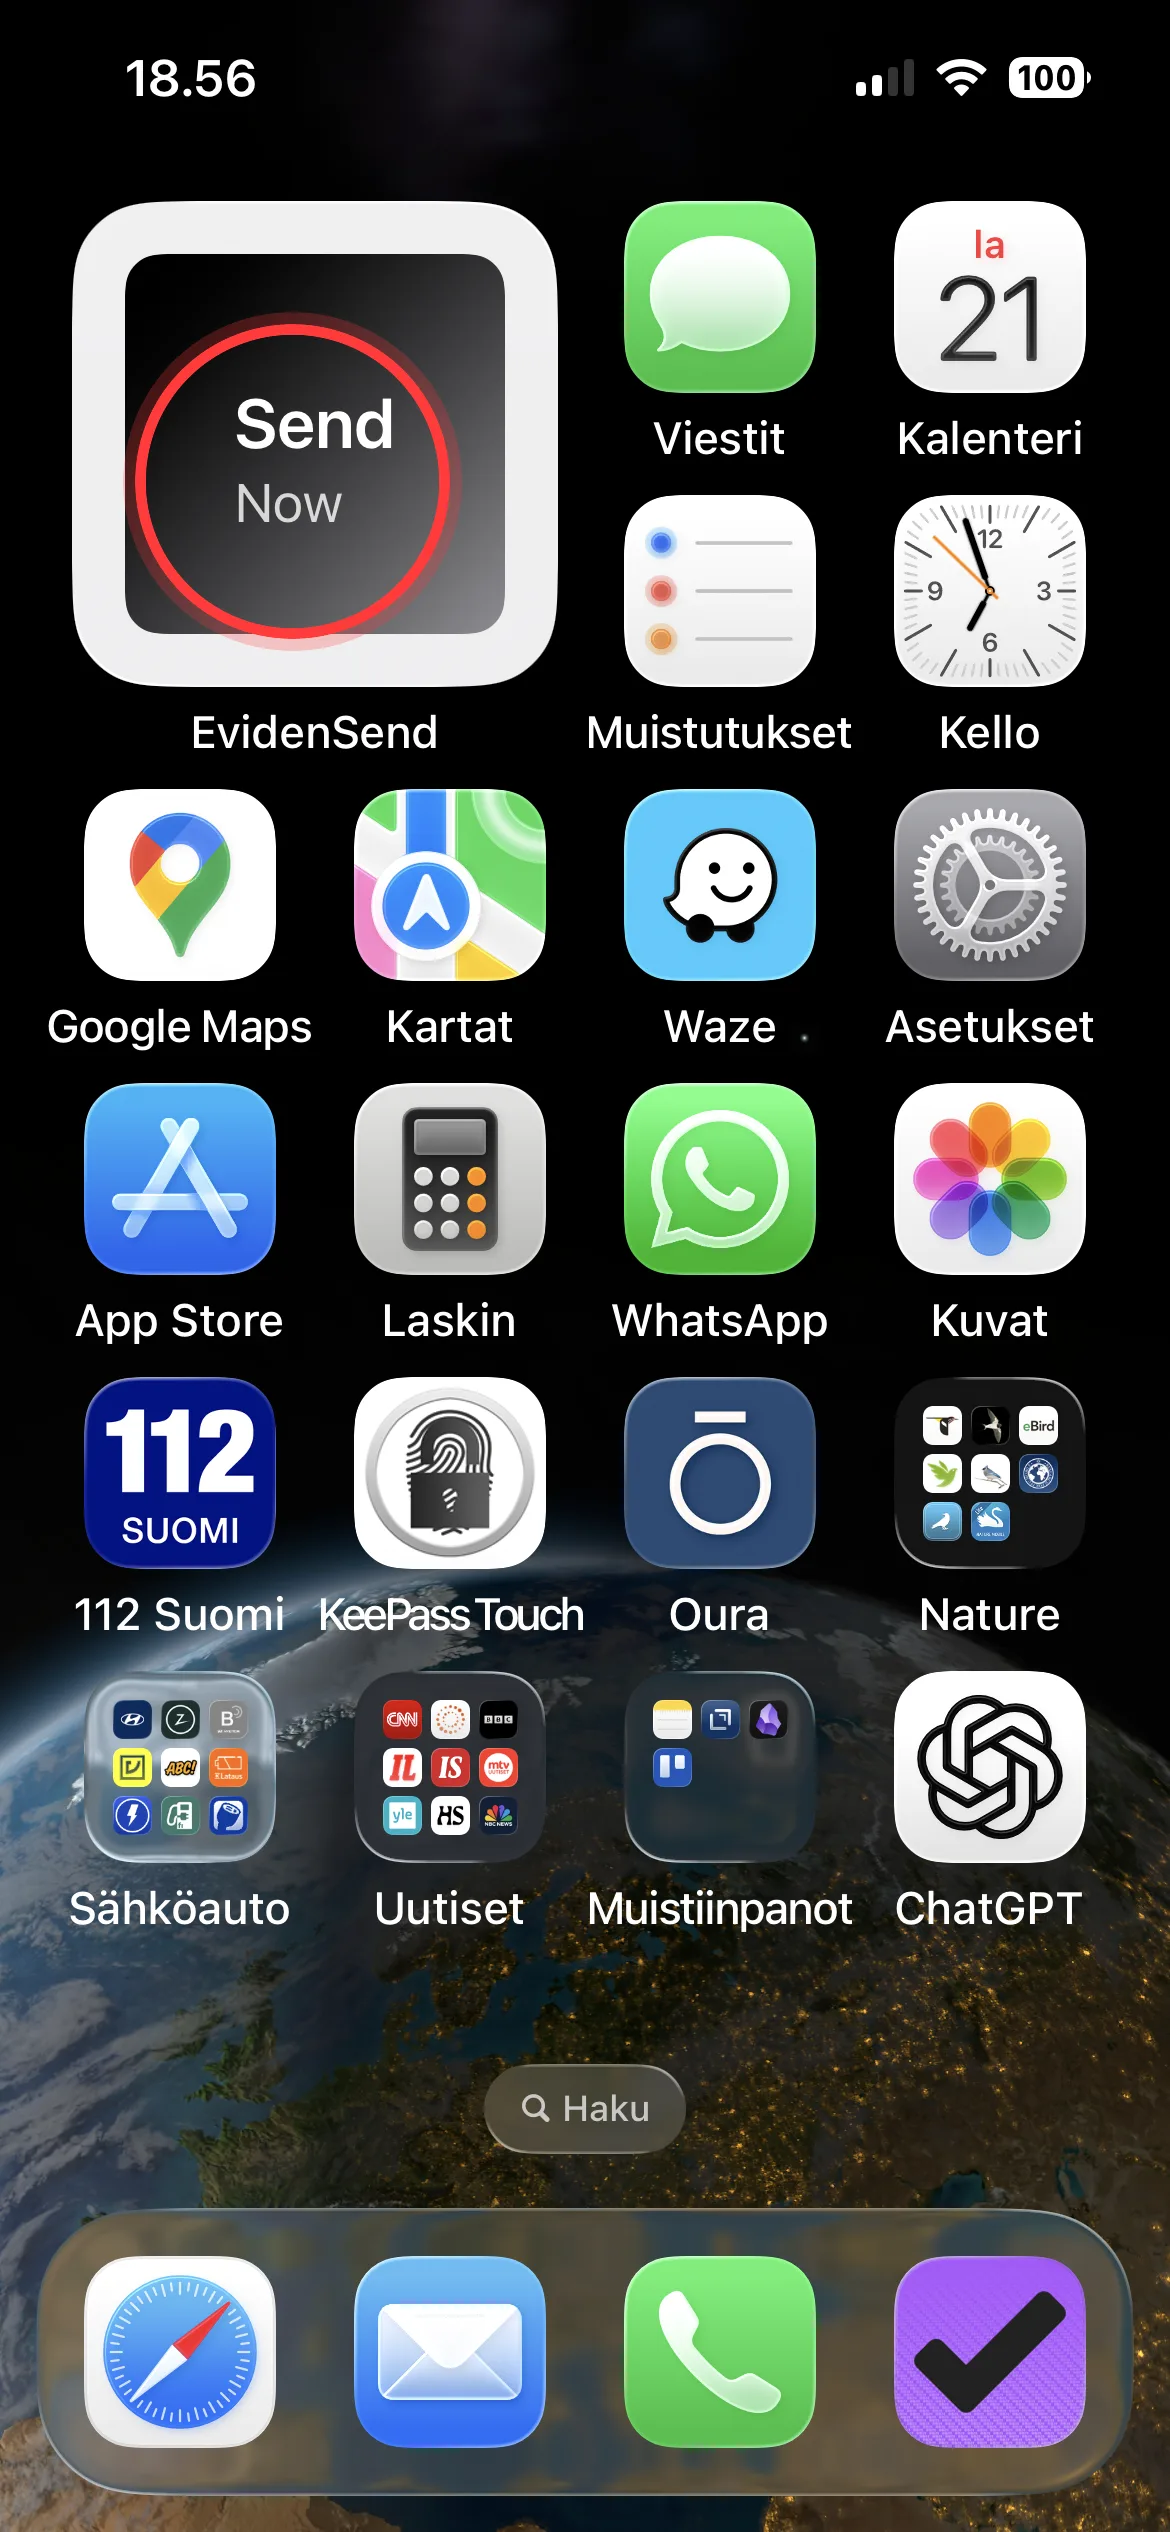
Secondary: Home Screen Send Now widget.
Fallback: Start and Send Now button inside the app.
If a phone call interrupts recording or the app goes to the background, recording stops and you need to start a new session.
Primary: Lock Screen Send Now widget.Secondary: Home Screen Send Now widget.
Fallback: tap Start and Send Now inside the app.
5. Daily use: recording controls
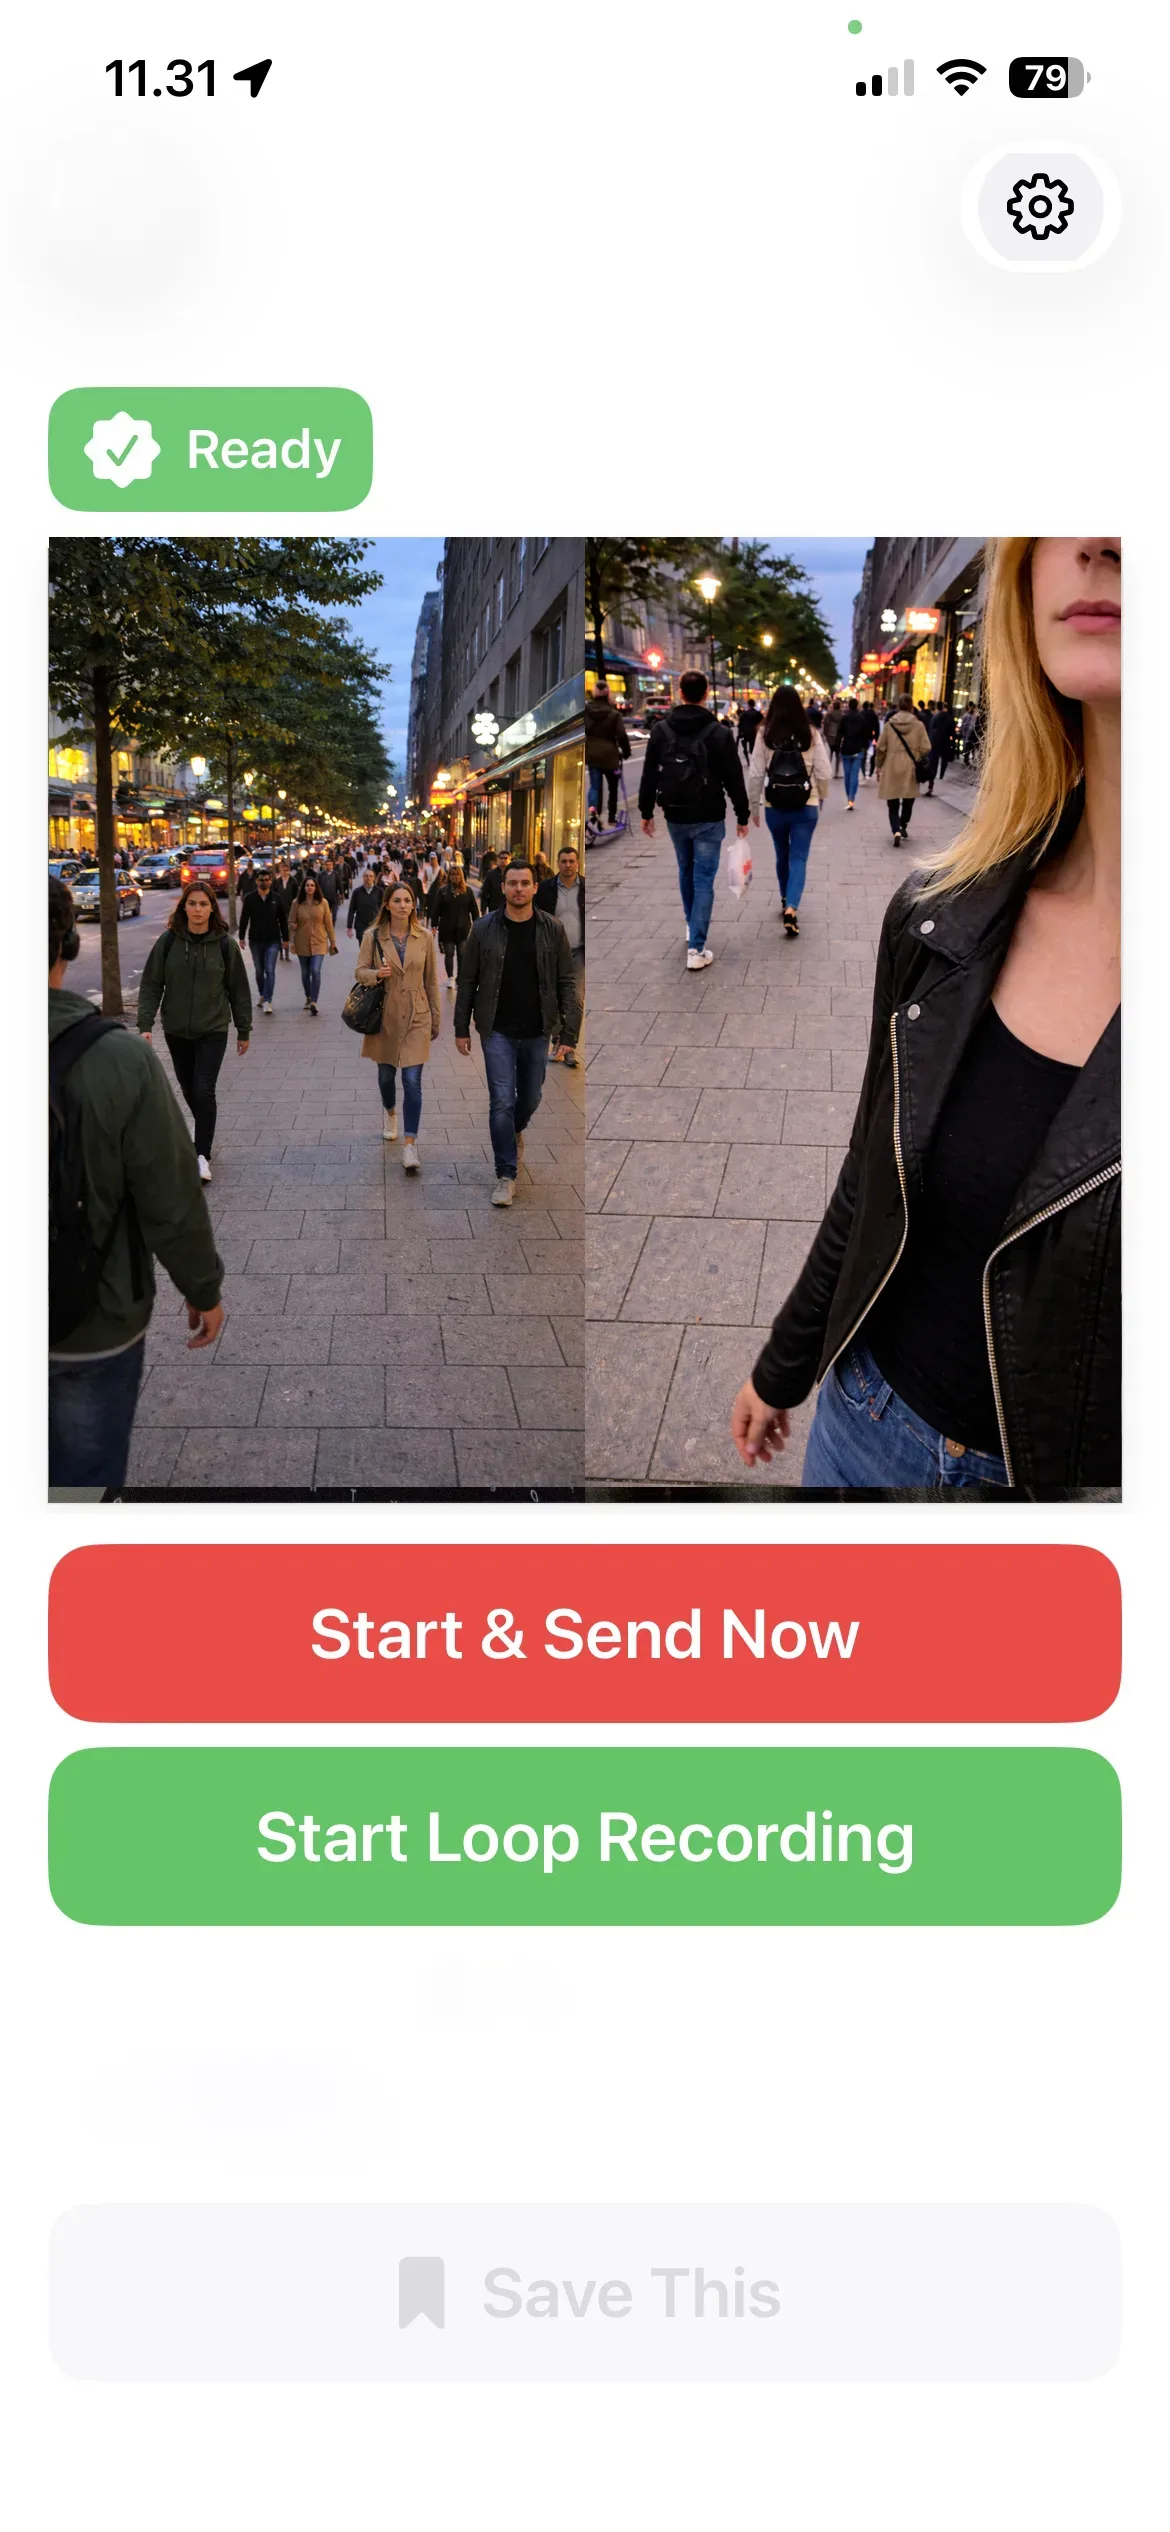
During active use, the same recording flow keeps the essential actions visible and clear.
Send Now recording in progress with live delivery active.
Start and Send Now
Use Send Now when you want recording and delivery to begin right away from the app.
Loop Recording
Loop Recording keeps a rolling local buffer on the device so you can save and send clips later if needed.
Notify by SMS
When SMS recipients are configured, EvidenSend can open a ready-made message for those recipients. You still need to tap Send in Messages, because iPhone apps cannot send SMS automatically without user confirmation.
6. Delivery options
Delivery setup is where you define what is stored locally, what moves off the device, and who receives it.
Configure Dropbox, Email, and recipient delivery.Turn on On This iPhone and iCloud protection, and use Files sharing when needed.
On This iPhone
Keeps local copies on the device for your own access.
iCloud
Provides off-device protection and access through the Files app. You can also share the folder from Files if needed.
Email
Useful when you want clips or delivery messages sent to a mailbox you already monitor.
Dropbox
Useful for cloud storage and link-based sharing when Dropbox delivery is enabled. If Dropbox links are not being created, check that the email address on that Dropbox account is verified. If the app shows a Dropbox verification link, use it there.
SMS recipients
Available when Email or Dropbox delivery is enabled. Useful for quick notification. EvidenSend opens a ready-made SMS message, and you then send it yourself in Messages. Location or Dropbox links can be included when enabled.
7. iCloud folder sharing
Open Files.
Go to iCloud Drive.
Open the EvidenSend folder.
Use Share or Collaborate.
Access stays active until you stop sharing it.
This is useful if a trusted contact should be able to access the folder if something happens to you.
8. Check your result
After your first test, verify that the message content is clear and that the right destination received it.
Example email
Subject: EvidenSend Test - Delivery Confirmation
Body example:
This is a test send from EvidenSend.
Time: 2026-03-08 14:12
Sender: My iPhone
Delivery mode: Send Now
Optional location link: https://maps.apple.com/?ll=60.1699,24.9384
Example SMS
Message example:
EvidenSend test message.
Send started at 14:12.
Sender: My iPhone.
Optional location: https://maps.google.com/?q=60.1699,24.9384
Add real screenshots here later: one successful Email example and one successful SMS example.
9. Troubleshooting
If delivery fails, check permissions, network, and destination availability first.
If recording stopped after a phone call or after moving the app to the background, reopen EvidenSend and start a new recording session.
If Dropbox fails, reconnect account, verify storage access, and make sure the Dropbox account email address is verified if you need Dropbox links.
If SMS or email recipients fail, re-check recipient details and regional sending constraints.
If a test worked once but not later, check whether account credentials, app passwords, or sharing permissions changed.
10. Optional tips for dedicated accounts
If you want, create a separate email account only for EvidenSend delivery.
If you want, keep EvidenSend files in a separate Dropbox folder or account setup.
If you want, create dedicated recipient accounts just for receiving EvidenSend deliveries.
If you want, share recipient account access with a trusted person for backup visibility.
Keep recipient list short and verified.
Review retention policy regularly and delete old files you do not need.